Take a Screenshot of Cesium Applications with GitHub's GPU Runner and Playwright
2024-07-24

Hello, this is Hiroki Inoue, the CTO.
At Eukarya, we are working to improve the quality of our services, and as part of this effort, we are focusing on automating E2E tests.
There are many tools available for automating E2E tests, but recently, we often use Playwright. With Playwright, you can run E2E tests on a web browser with concise JavaScript/TypeScript code, which is very convenient.
However, many of the applications we handle at Eukarya, such as Re:Earth and PLATEAU VIEW, use WebGL. Testing these applications with Playwright required some ingenuity beyond what is needed for regular applications, so We will explain the key points here.
Setting up a GPU Runner
First, to test WebGL applications, you need a GPU.
Although it is actually possible to run WebGL without a GPU in Chromium, it takes a considerable amount of time for rendering, making it impractical.
Fortunately, GitHub has recently made GPU runners available in GitHub Actions, so automated testing using a GPU is now possible in GitHub Actions!
You need to set up the GPU runner in advance, but the procedure is a bit confusing, so We'll jot it down here. Please note that the UI may change in the future.
First, navigate to the Actions/Runners settings screen from the Organization settings screen. The URL should look something like this:
https://github.com/organizations/{{ORGANIZATION}}/settings/actions/runners
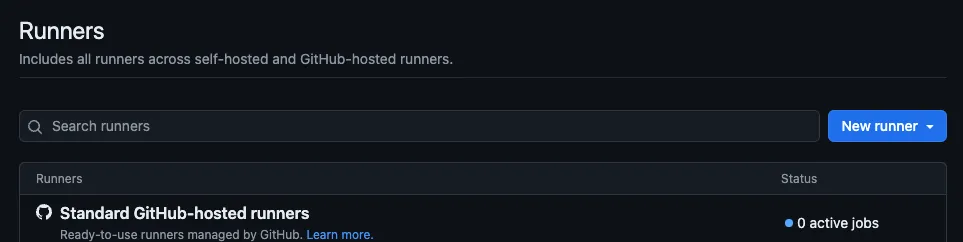
Click "New runner" and choose "New GitHub-hosted runner". This will bring you to the runner setup screen.
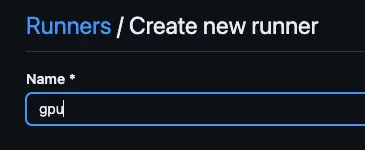
First, enter a Name, which will be the string you write in the runs-on field of the GitHub Actions workflow file mentioned later. It's best to use lowercase kebab-case. Here, we will use gpu.
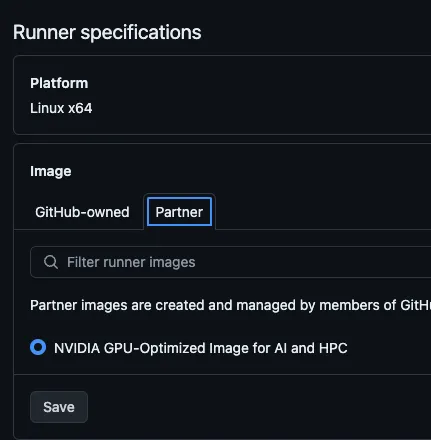
Leave the Platform as Linux x86 and click Save to proceed. In the Image settings, click on the "Partner" tab, and you will see the option "NVIDIA GPU-Optimized Image for AI and HPC". This is the GPU (I wasted a lot of time finding this Partner tab...).
Although this T4 is primarily an AI GPU, it also accelerates 3D graphics as mentioned later.
After setting everything up as usual, the runner will be ready for use.
If you only want to try it out, the Default runner group is fine, but as mentioned later, the GPU runner is not free and incurs costs, so it might be a good idea to separate the runner group to prevent unintended abuse.
As for the cost, at the time of writing, the fee for the GPU runner (Ubuntu GPU 4-core) is 0.008/min. Therefore, GPU runners are indeed more expensive. It is advisable to use GPU runners only for testing applications that require a GPU and use regular runners for other conventional E2E tests.
Preparing Playwright
Once you have set up the GPU runner, let's create a repository and initialize Playwright. If you have an environment where Node.js is available, you can initialize it with
npm init playwright@latest
Change the playwright.config.ts to run only Chromium. Set the retry count to 0 and extend the default timeout from 30 seconds to 10 minutes. Also, specify the directory to save screenshots and other snapshots with snapshotDir for easier artifact uploads in CI.
Note that no special args for Chromium to use the GPU are required.
export default defineConfig({
  // ...
  retries: 0,
  timeout: 10 * 60 * 1000, // 10m
  snapshotDir: './snapshots',
  projects: [
    {
      name: 'chromium',
      use: {
        ...devices['Desktop Chrome']
      },
    },
  ]
});
Next, edit the GitHub Actions workflow.
- Write the label name of the GPU runner you set earlier in
runs-on. - Since we want to take screenshots this time, configure the workflow to upload screenshots as artifacts. Also, download the previous artifacts before starting the test.
- Set up inputs so you can update snapshots when needed.
name: Playwright Tests
on:
  workflow_dispatch:
    inputs:
      update_snapshots:
        description: 'Update snapshots'
        required: false
        default: false
        type: boolean
  # Uncomment to run daily at midnight
  # schedule:
  #   - cron: '0 0 * * *'
  push:
    branches: main
jobs:
  test:
    timeout-minutes: 60
    runs-on: gpu # The label name of the GPU runner you set
    steps:
      - uses: actions/checkout@v4
      - uses: actions/setup-node@v4
        with:
          node-version: lts/*
      - name: Restore artifacts
        uses: dawidd6/action-download-artifact@v6
        with:
          name: playwright-snapshots
          path: snapshots/
          workflow_conclusion: success
          if_no_artifact_found: warn
      - name: Install dependencies
        run: npm ci
          - name: Install Playwright Browsers
        run: npx playwright install --with-deps

      - name: Run Playwright tests
        if: ${{ !inputs.update_snapshots && github.event_name != 'push' }}
        run: npx playwright test

      - name: Run playwright test with snapshot update
        if: ${{ inputs.update_snapshots || github.event_name == 'push' }}
        run: npx playwright test --update-snapshots

      - uses: actions/upload-artifact@v4
        if: always()
        with:
          name: playwright-snapshots
          path: snapshots/
          retention-days: 30
      - uses: actions/upload-artifact@v4
        if: always()
        with:
          name: playwright-report
          path: playwright-report/
          retention-days: 30
Writing a Test
Edit tests/example.spec.ts.
Here, we will write a test that visits PLATEAU VIEW, waits for 30 seconds, and then takes a screenshot.
Additionally, to check if Cesium is properly loading the data and if any unexpected errors are occurring, we log network requests and console logs every time they occur. This makes it easier to identify the cause on GitHub if a test suddenly fails.
import { test, type Page } from '@playwright/test';

test('take screenshot after loading', async ({ page }) => {
    printConsole(page);

  await page.goto('https://plateauview.mlit.go.jp/');

  await page.waitForTimeout(30 * 1000); // 30s

  await page.screenshot({ path: 'snapshots/screenshot.png' });
});

function printConsole(page: Page) {
  page.on('pageerror', exception => {
    console.error('❌', exception);
  });

  page.on('requestfinished', request => {
    console.error('⚡', request.url());
  });

  page.on("requestfailed", request => {
    console.error('❌', request.url() + ' ' + request.failure()?.errorText);
  });

  page.on('console', async msg => {
    const values: any[] = [];
    for (const arg of msg.args())
      values.push(await arg.jsonValue());
    if (values.length > 0) {
      console.log('ℹ', ...values);
    }
  });
}
Then, we can run this command to run this test.
npx playwright test
The test itself can now be run, and if it is a GPU runner, a screenshot will be taken without any problems and the screenshot will be saved in the snapshots directory!
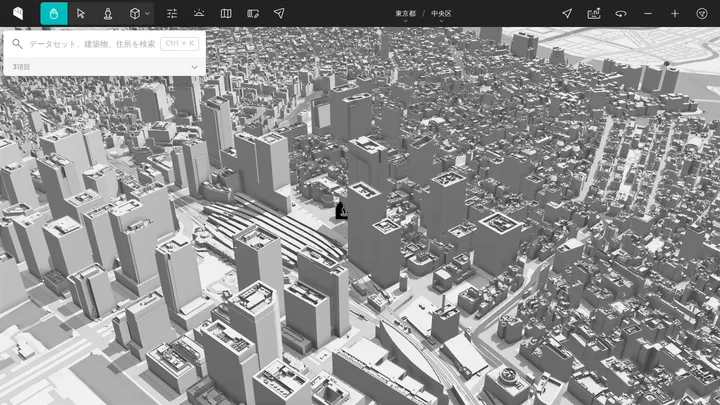
Continuously Taking Screenshots Until the Screen Stabilizes
In the above approach, we manually set the wait time before taking the screenshot. However, in practice, it often happens that the screenshot is taken while the data is still loading, as shown below.
Typically, when opening such a map application, a large number of data loads occur, including tiles, and these parts are often rendered with delays as the data is loaded. Therefore, predicting how many seconds to wait before the data is fully loaded and a screenshot can be taken is difficult as it depends on the network and delivery server conditions.
We also tried await page.waitForLoadState('networkidle');, but it took about 60 seconds on our machine, and the use of networkidle is generally discouraged (refer to the official Playwright documentation). Moreover, there is no feature in WebGL to wait until a specific object is displayed, unlike Auto-retrying assertions in the DOM.
Therefore, instead of checking for network requests, We thought it would be better to consider that the screen is stable if no changes occur for a certain period and then take the screenshot.
Take repeated screenshots at intervals of a few seconds and compare each one with the previous screenshot. If the screenshot does not change for three consecutive times, consider that the data loading is complete and the screen is stable, and finish the test.
Let's implement this. You can use Buffer.compare for comparing Buffers.
import { type Page, test } from '@playwright/test';

// Adjust the screenshot frequency based on actual tests
const defaultInterval = process.env.CI ? 5000 : 1000;

async function waitForStableScreen(page: Page, path?: string = undefined, interval = defaultInterval, retries = 3): Promise<Buffer> {
  let previousScreenshot: Buffer | null = null;
  let noChangeCount = 0;
  let count = 0;

  while (true) {
    const screenshot = await page.screenshot({
      path,
      fullPage: true
    });
    if (previousScreenshot) {
      if (Buffer.compare(previousScreenshot, screenshot) === 0) {
        noChangeCount++;
        if (noChangeCount >= retries) {
          console.log(`📷 stable screen! it takes ${interval * count} ms`);
          return screenshot;
        }
      } else {
        noChangeCount = 0;
      }
    }

    previousScreenshot = screenshot;
    count++;
    console.log(`📷 wait ${interval} ms (x${count}${noChangeCount > 0 ? `, no change x${noChangeCount}/${retries}` : ""})`);
    await page.waitForTimeout(interval);
  }
}

// ...

test('take screenshot after loading', async ({ page }) => {
  // ...
  await page.goto('https://plateauview.mlit.go.jp/');

  await waitForStableScreen(page, 'snapshots/screenshot.png');
});
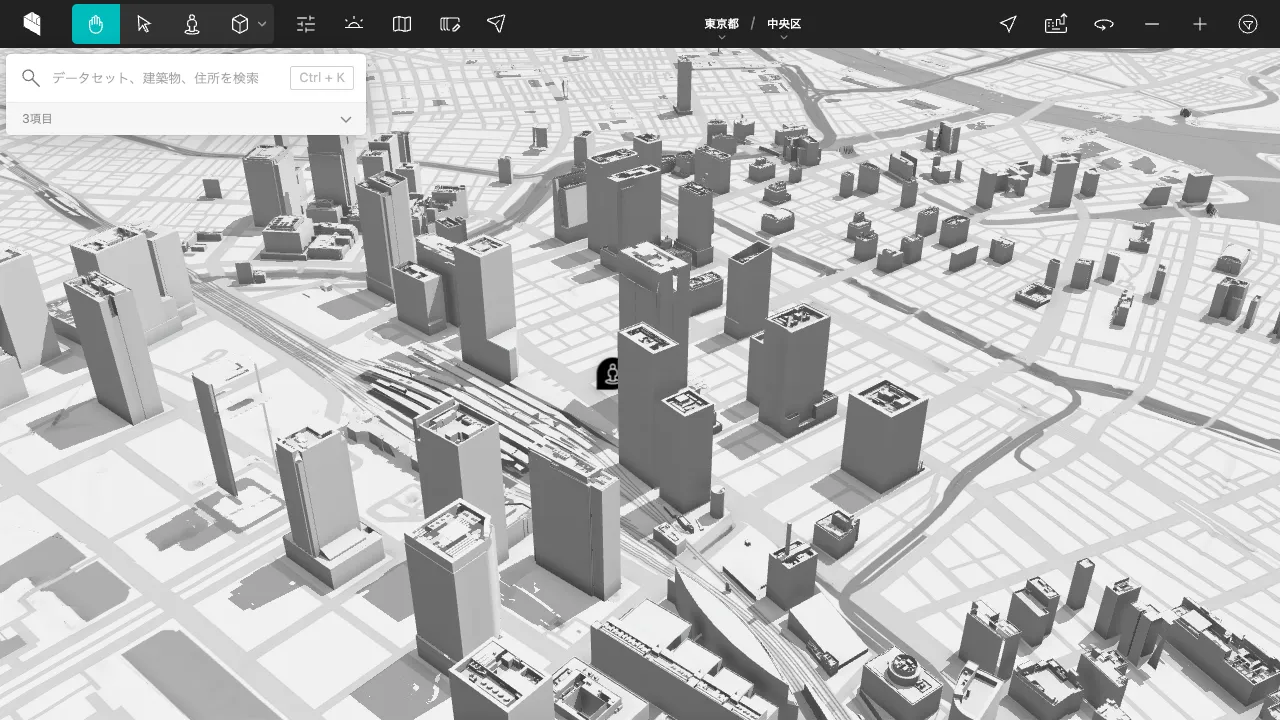
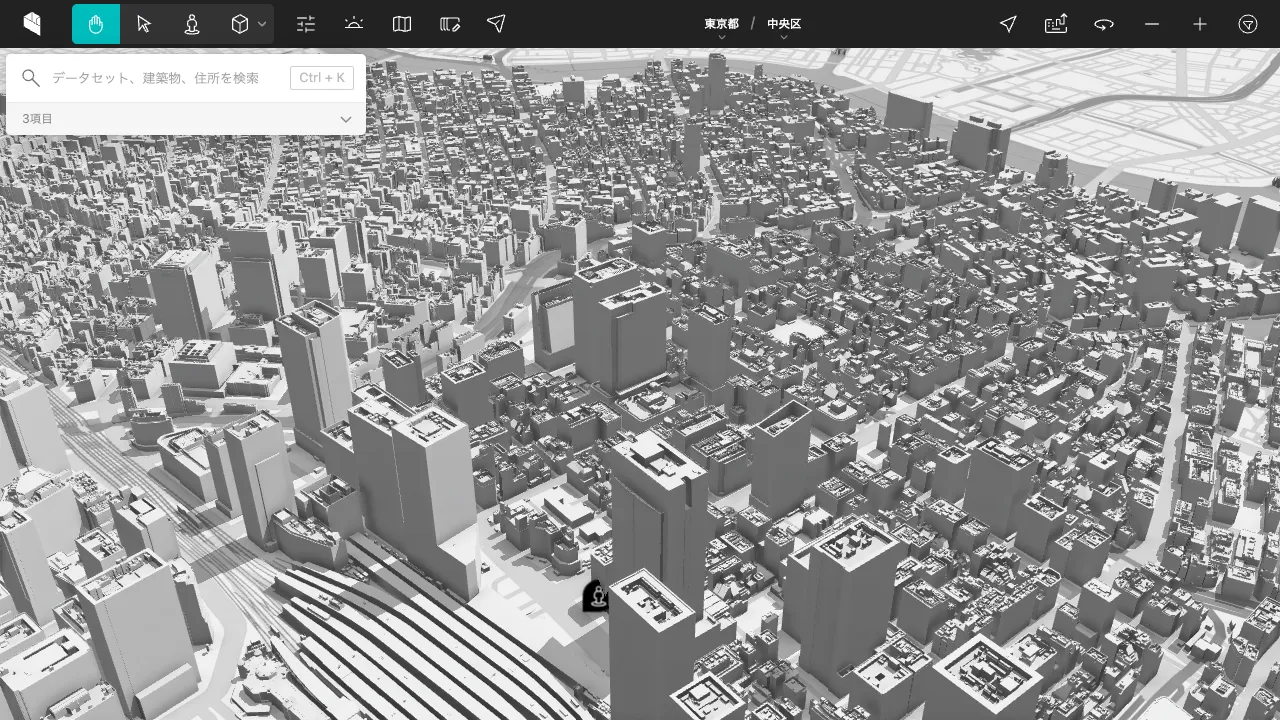
With this implementation, you can reliably take a screenshot of the fully loaded state of the screen, as shown below.
In our tests, the screenshot took about 20 seconds to complete on our machine and 7 to 10 minutes on GitHub's GPU runner. The likely reason is that the runners are in the US, making the download of data from servers in Japan slow, thus increasing the test completion time.
Note that this technique only works for applications like PLATEAU VIEW, where no animations occur if nothing is operated. For applications with constant animations, this technique is not applicable (however, for DOM or CSS animations, Playwright allows disabling CSS animations and masking DOM elements).
As for the cost, at the time of writing, the GPU runner costs 0.7 per run. Running it daily would cost about $21/month.
We also tried running the same test on a regular ubuntu-latest runner, but the rendering was extremely slow, reaching over an hour (actual time not measured). A GPU was indeed necessary.
Moving the Camera with Mouse Operations
With Playwright, you can perform arbitrary mouse operations at specified coordinates, enabling actions like camera dragging and object selection.
For example, let's drag the camera down by 200px from the center of the canvas to move it slightly.
import { expect, type Page, test } from '@playwright/test';
// ...

test('move camera', async ({ page }) => {
  await page.goto('https://plateauview.mlit.go.jp/');
  await page.waitForTimeout(5000);

  const box = await page.locator('.cesium-widget > canvas').boundingBox();
  if (!box) throw new Error('no canvas found');

  const x = box.x + box.width / 2;
  const y = box.y + box.height / 2;

  await page.mouse.move(x, y);
  await page.mouse.down();
  await page.mouse.move(x, y + 200);
  await page.mouse.up();

  const screenshot = await waitForStableScreen(page, 'snapshots/screenshot.png');
})
As a result, a screenshot like the one below was taken. You can see that the camera position has moved compared to the previous screenshot.
Completing the Visual Regression Testing Setup
Now that you have a screener, you can perform a snapshot test. By performing this snapshot test periodically and comparing the differences from the previous scrubbing, you will be able to detect anomalies and unintended degregation in the service. This is Visual Regression Testing (VRT).
In the GitHub Actions workflow described above, the comparison can be performed by saving the snapshot as an artifact and downloading and using the previous artifact the next time it is tested.
import { expect, type Page, test } from '@playwright/test';
// ...

test('take screenshot after loading', async ({ page }) => {
	// ...
  await page.goto('https://plateauview.mlit.go.jp/');

  const screenshot = await waitForStableScreen(page);
  expect(screenshot).toMatchSnapshot('screenshot.png');
});
Although not detailed here, it may be useful in combination with tools such as reg-suit to store snapshots externally and to display the differences in the scrubs in a more visual way!
Conclusion
Surprisingly, it was easy to do a visual regression test of a Cesium application using WebGL in Playwright. This is also thanks to GitHub hosting the GPU runner, which makes it easy and convenient to use GPUs.
To change the subject a little, from the SRE Observability point of view, simple HTTP request outline monitoring is not enough to monitor whether a map application like Cesium is working properly, so in these cases, too, this Playwright and GPU runner may be effective in this case as well.
However, in a mapping application such as Cesium, where a large amount of data downloads occur, it can take a long time to take stable screenshots, so this must be taken into account when designing the test cases.
If measures can be taken such as running tests in parallel as much as possible, changing the runner region geographically closer to the data (which is not possible at the moment), or optimizing the data itself, it is likely that the screenshots will be taken faster.
Finally, Eukarya is looking for a QA engineer to help drive test automation like this! It is rare for a company to work on this kind of QA in the GIS and 3DCG domain, and there are few precedents, so we think you will be able to take on a variety of challenges.
Eukaryaでは様々な職種で採用を行っています!OSSにコントリビュートしていただける皆様からの応募をお待ちしております!
Eukarya is hiring for various positions! We are looking forward to your application from everyone who can contribute to OSS!
Eukaryaは、Re:Earthと呼ばれるWebGISのSaaSの開発運営・研究開発を行っています。Web上で3Dを含むGIS(地図アプリの公開、データ管理、データ変換等)に関するあらゆる業務を完結できることを目指しています。ソースコードはほとんどOSSとしてGitHubで公開されています。
➔ Re:Earth / ➔ Eukarya / ➔ note / ➔ GitHub
Eukarya is developing and operating a WebGIS SaaS called Re:Earth. We aim to complete all GIS-related tasks including 3D (such as publishing map applications, data management, and data conversion) on the web. Most of the source code is published on GitHub as OSS.